Data Master allows you to standardize and validate customer data before it gets shared across systems, applications and teams. It encompasses the following features:
A core concept used throughout Data Master is the Data Point. A Data Point is an umbrella term for a unit of data collected with mParticle’s SDKs and APIs. For the most part, Data Points are events (for example, Custom Events or Screen Views) but they also include user attributes (such as Customer Id or Email).
Catalog gives you a single view of every unique event, attribute and identity collected in an mParticle workspace, detailed insights into each of these Data Points, and lets you provide your own annotations.
You can use the Catalog’s List view to:
The list view displays six main categories:
You can filter the list view to find specific Data Points by:
dev
or prod
environments.Channel: show Data Points that have been seen for the selected channel. Channel is distinct from input and describes how a Data Point arrived at mParticle. For example, a Data Point may arrive fron the client-side, server-side, or from a partner feed. Valid channels include:
native
javascript
pixel
partner
server_to_server
You can combine the above filters to quickly browse and explore your Data Points. Setting a filter will also clear any current category selection.
The details view gives you detailed information on an individual Data Point, including environments the event has been captured for, and when an event was last seen for each platform.
Users with admin
access can annotate Data Points in the following ways:
Your event Data Points may include attributes, and the details view shows every attribute name that has ever been seen within the given Data Point. You can see the total volume received in the last 30 days, when the attribute was last seen, and the detected data type. The supported detection types are:
For Data Points, the stats view shows two important groups of statistics for a selected date:
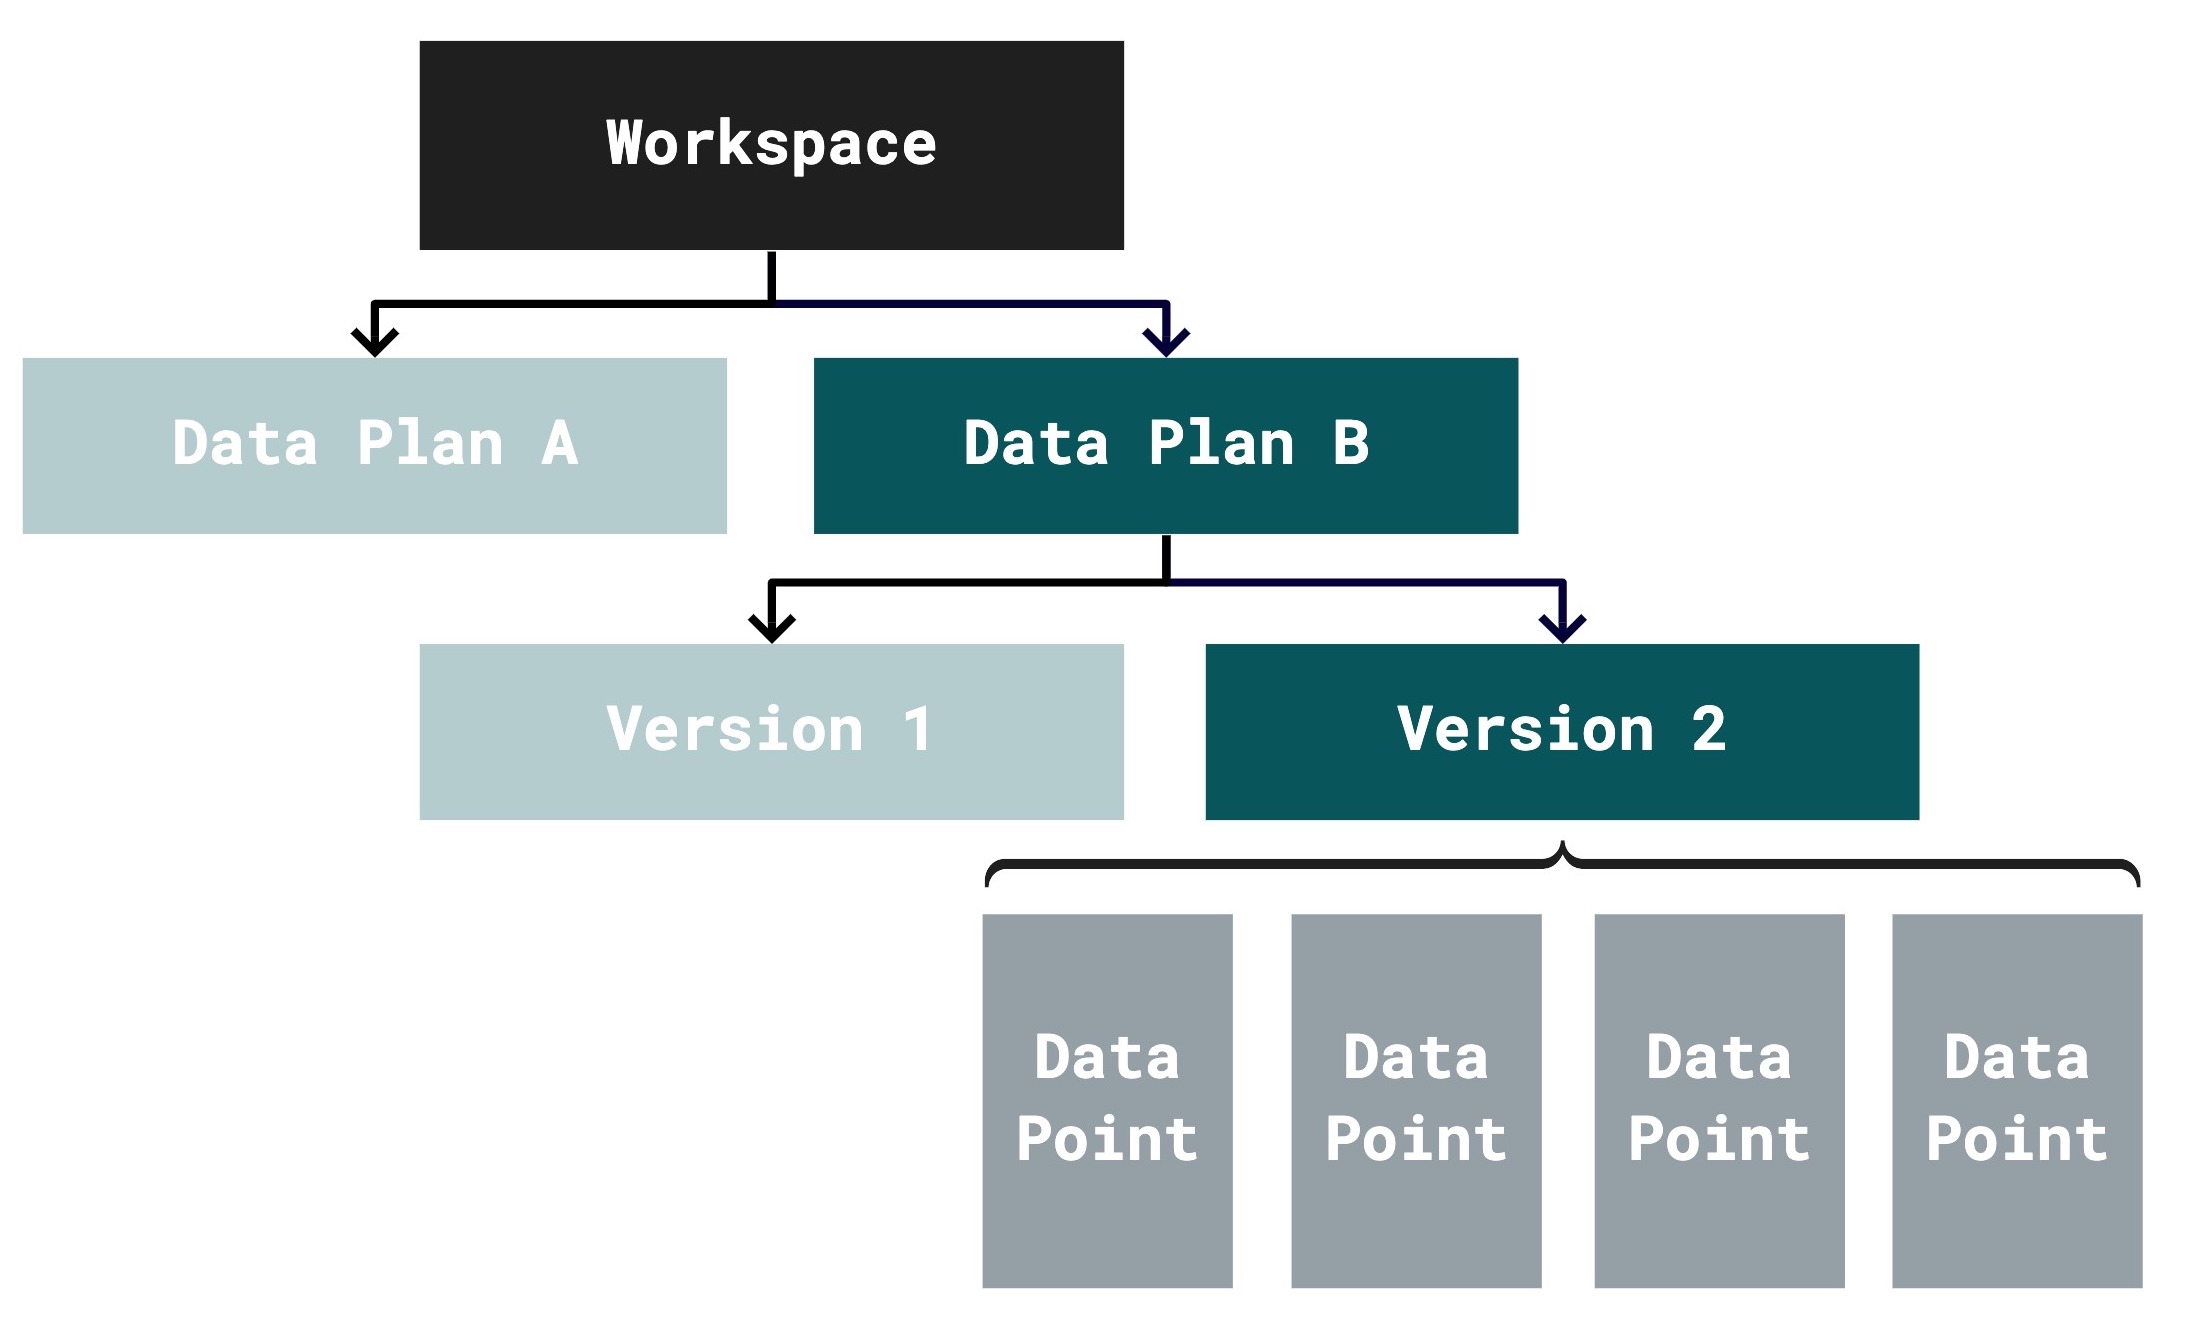
A Data Plan is a set of expectations about the extent and shape of your data collected with mParticle. A plan is composed of the following elements:
Data Plans are underpinned by the Data Planning API. Some example use cases you can achieve with the Data Planning API are:
Navigate to the Data Planning API guide for more information.
To start using Data Plans, you can follow these steps:
As you use plans, you may find it better to adhere to a single plan or to create multiple plans. You can choose to have all of your feeds and inputs share the same plan, or create a unique plan for every individual client-side and server-side input. A few common cases could be:
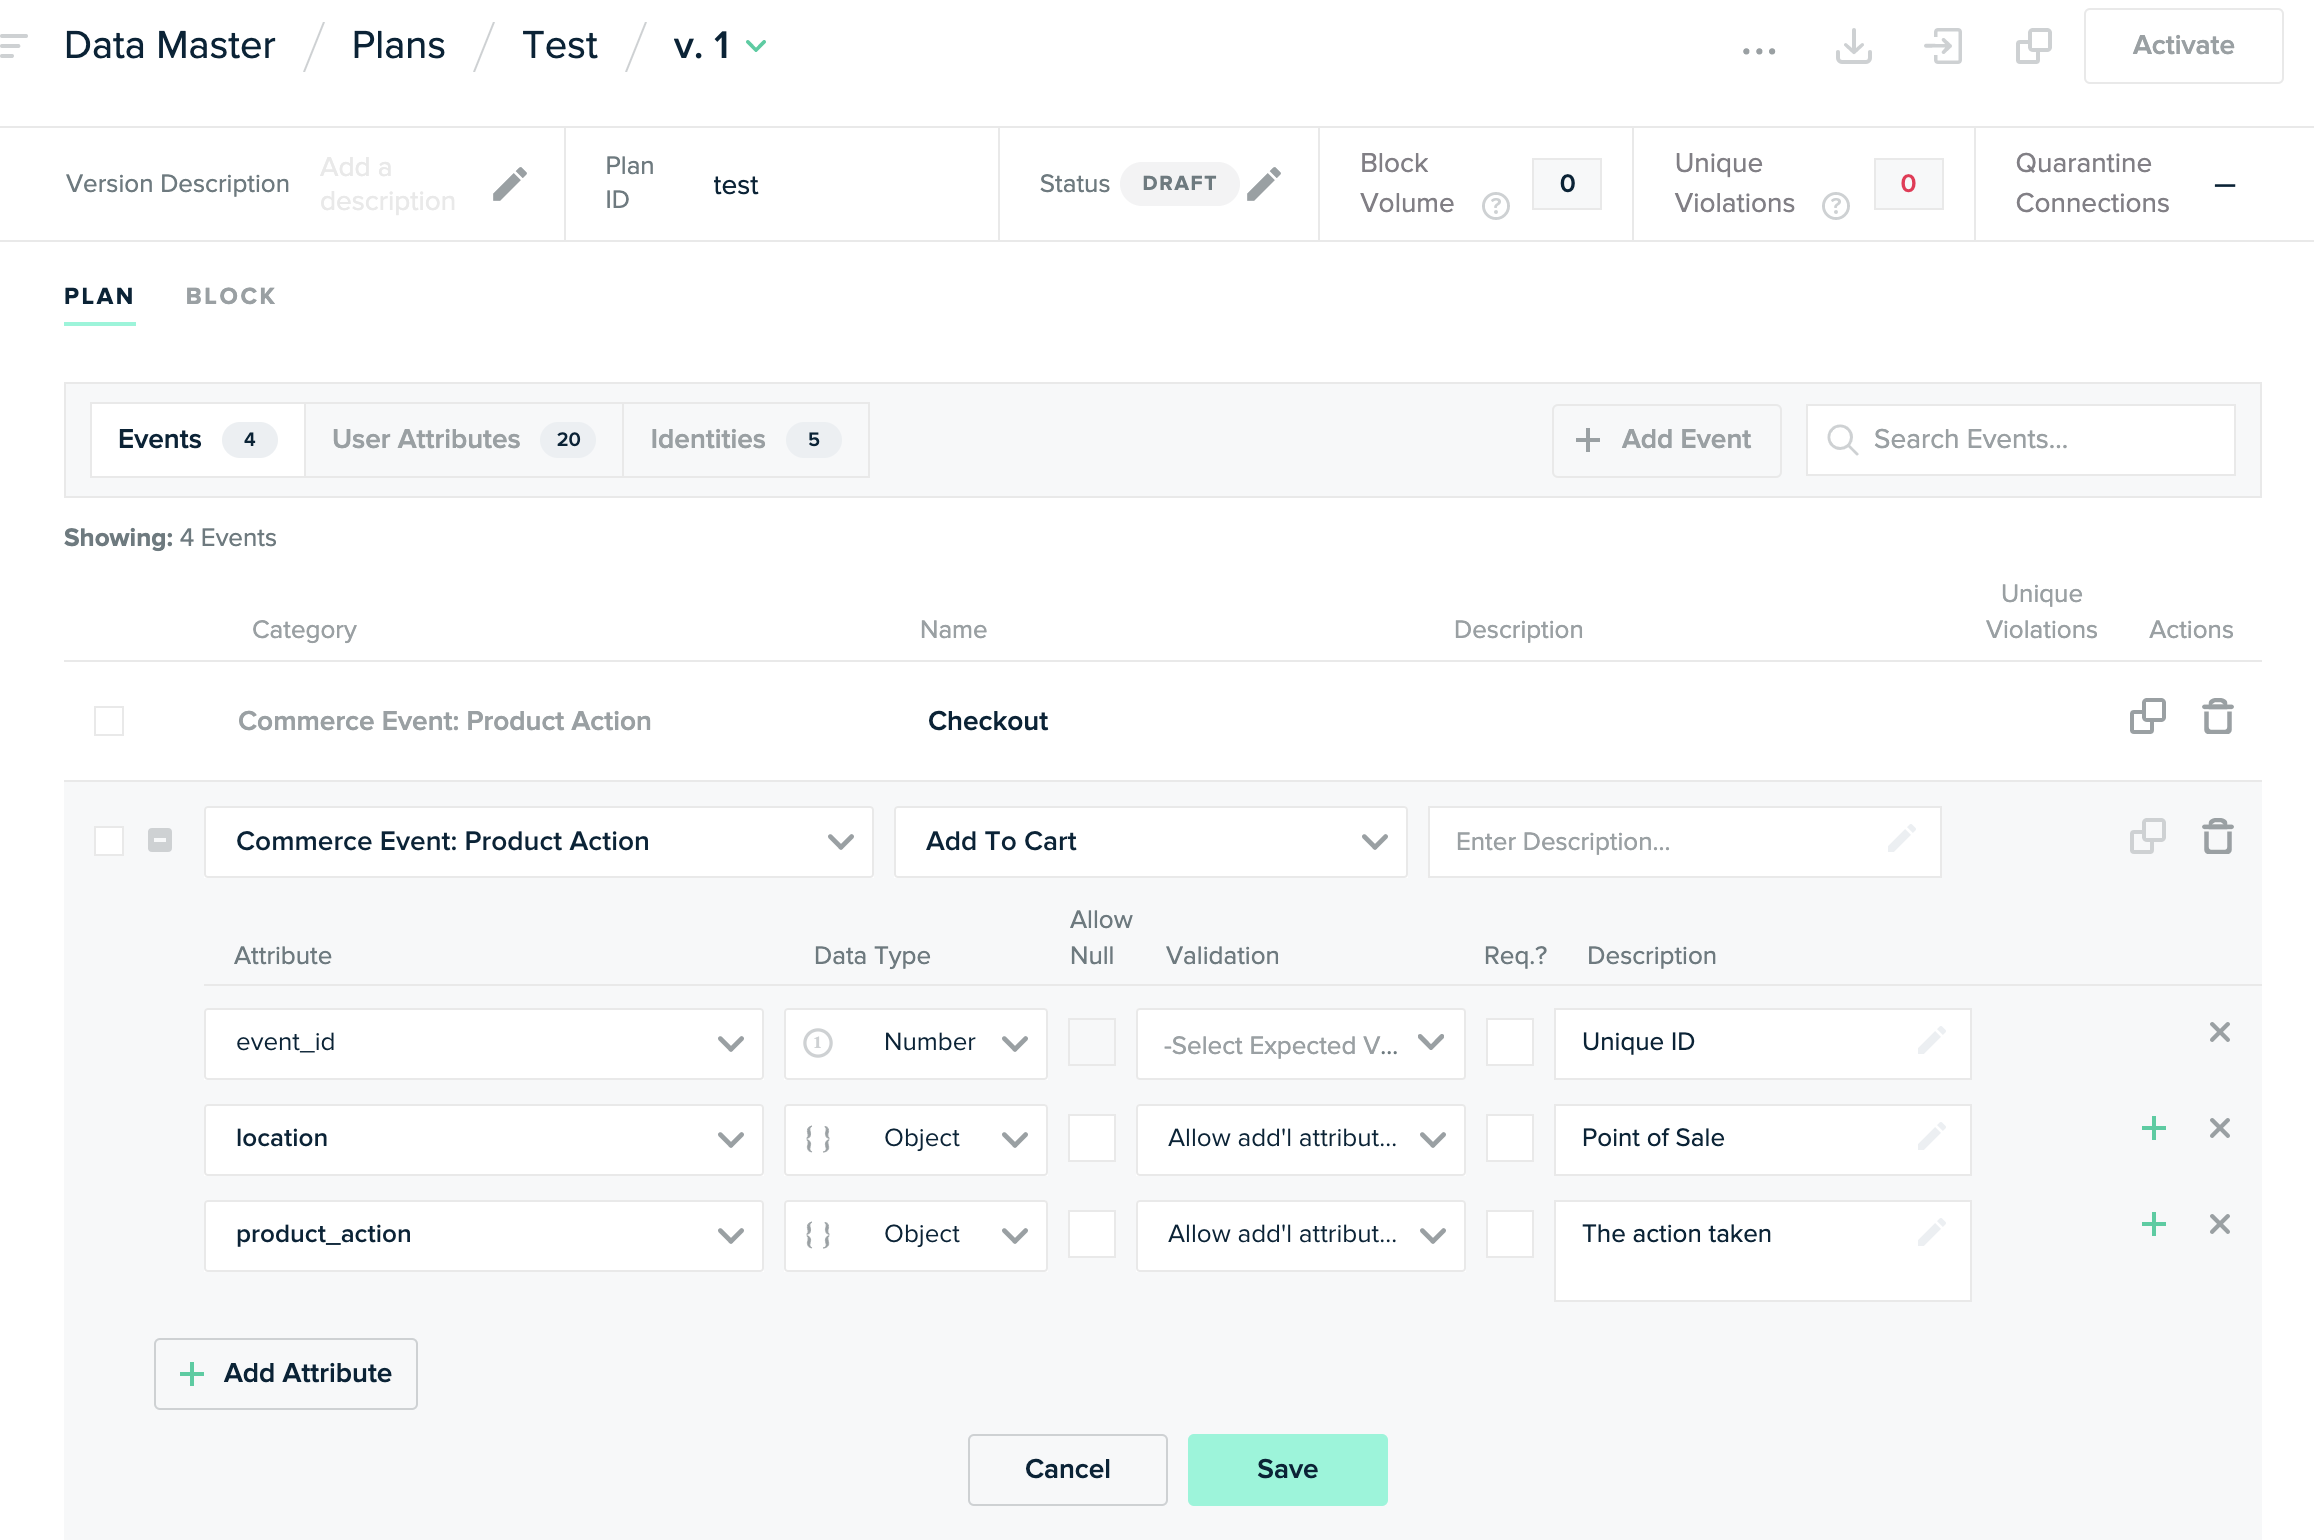
To create a new plan:
You can import existing Data Points from various sources:
To start verifying incoming data against your plan, you first need to first activate your plan in dev
or prod
.
Now that your plan is active, you need to ensure that incoming data is tagged with your plan’s id. Check out our Developer Guide to learn how to complete this step.
Tagging data requires a small code change. In order to enforce a plan, data must be tagged with a plan ID and an environment. You can optionally tag data with a version to pin your validation against a specific plan version.
Data Planning is supported by the following mParticle SDKs:
Web | v2.1.1 or later | Github |
iOS | v7.13.0 or later | Github |
Android | v5.12.0 or later | Github |
Python | v0.10.8 or later | Github |
Java | v2.2.0 or later | Github |
Roku | v2.1.3 or later | Github |
development
or production
): The environment of your data. mParticle will use this to look for plans that are activated in the given environment.Navigate to the your plan listing page to find your plan ID. In the following image, mobile_data_plan
is the plan ID and should be used in the code snippets below:
Include the plan ID and environment in all batches sent to mParticle. For client-side SDKs, you must provide this metadata on initialization of the SDK. For the Events API, you must include it in every request body. You can optionally add a plan version to pin your validation against a specific version.
{
"context": {
"data_plan": {
"plan_id": "mobile_data_plan",
"plan_version": 2
}
},
"environment": "development",
"user_identities":{...},
"events": [...]
}
let options = MParticleOptions(
key: "REPLACE WITH APP KEY",
secret: "REPLACE WITH APP SECRET"
)
options.dataPlanId = "mobile_data_plan"
options.dataPlanVersion = @(2)
options.environment = MPEnvironment.development;
MParticle.sharedInstance().start(options);
var options = MParticleOptions.builder(this)
.credentials("REPLACE WITH APP KEY", "REPLACE WITH APP SECRET")
.environment(MParticle.Environment.Development)
.dataplan("mobile_data_plan", 2)
.build()
MParticle.start(options)
window.mParticle = {
config: {
isDevelopmentMode: true,
dataPlan: {
planId: 'mobile_data_plan',
planVersion: 2,
}
}
};
options = {}
options.apiKey = "REPLACE WITH API KEY"
options.apiSecret = "REPLACE WITH API SECRET"
options.dataPlanId = "REPLACE WITH DATA PLAN ID"
options.dataPlanVersion = 1 'REPLACE WITH DATA PLAN VERSION
'REQUIRED: mParticle will look for mParticleOptions in the global node
screen.getGlobalNode().addFields({ mparticleOptions: options })
Now that you have tagged incoming data, you can use Live Stream to view violations in real-time.
Once your plan is validating data, violations reports can help you monitor your data quality.
Your data needs will change over time and plans can be easily updated to reflect new implementations.
Smaller changes can be made directly to an existing plan version. Updates to active data plans will go live immediately. You just need to update the plan in the UI and save your changes.
For larger changes, we recommend creating a new plan version. Creating a new plan version allows you to track changes over time and to revert back to older versions if necessary.
Once you are confident that your plan reflects the data you want to collect, you can block unplanned data from being forwarded to downstream systems. You can think of this feature as a whitelist for the data you want to capture with mParticle: Any event, event attributes or user attribute that is not included in the whitelist can be blocked from further processing.
To learn more about this feature, make sure to read our FAQ.
You can plan for and validate the following events:
The following events are not yet included:
Here’s an example schema configuration for a screen event called “Sandbox Page View”:
This configuration states the following:
custom_attributes
object is required and any additional attributes that are not listed below should be flagged – the behavior for additional attributes is implied by the validation dropdown for the custom_attributes
object.anchor
is a string and it’s required.name
is a string and it’s optional.Let’s look at a couple examples to see this schema validation in action.
window.mParticle.logPageView(
'Sandbox Page View',
{
'anchor': '/home',
'name': 'Home',
}
)
This event passes validation.
window.mParticle.logPageView(
'Sandbox Page View',
{
'name': 'Home',
}
)
This event fails validation since the required anchor
attribute is excluded.
window.mParticle.logPageView(
'Sandbox Page View',
{
'anchor': '/home',
}
)
This event passes validation: The name
attribute is excluded but optional.
window.mParticle.logPageView(
'Sandbox Page View',
{
'anchor': '/home',
`label`: `Home`
}
)
This event fails validation: The label
attribute is unplanned and custom_attributes
has been configured to disallow additional attributes. You can change this behavior by changing the validation of the custom_attributes
object to Allow add'l attributes
(see below).
If you’re looking for an example of how to implement events that conform to your data plan, download your data plan and check out this tool. This tool will show you how to create a valid event for every point in your data plan and in any of our SDKs.
You can validate specific attributes differently depending on type.
Select a numeric range or an enumeration of allowed values.
String can be validated in three ways:
mParticle can validate that the data you send in matches what you expect. Data ingestion, validation, and federation occurs in the following sequence:
Use any API client or SDK to send data into the Events API, and tag the data with your plan ID, version, and environment. See the developer guide below for more information.
Your data then passes through the mParticle Rules engine. You can use your rules to further mutate, enrich, or even fix your data.
Data is then validated. “Validation results” are generated for stats and can also be sent to your integrations.
Data is then sent through the mParticle profile storage system. In the near future, you’ll be able to drop data before this stage to prevent corruption of your user profile storage.
Your data then passes through the rest of the mParticle platform and is sent outbound, including:
During plan enforcement, mParticle will generate “validation results” to represent plan violations. mParticle tracks the following types of violations automatically:
The Data Point is not part of your data plan. This means that no criteria of any of your Data Points matches this object.
The Data Point is defined in your data plan, however it has one or more data quality violations. This means that a Data Point criteria matches the object, but the respective Data Point’s schema resulted in errors, such as:
This means the attribute is defined within a matched Data Point, however it has one or more data quality violations such as:
An invalid attribute will cause the Data Point to also be marked as invalid.
The means the attribute was not defined within the matched Data Point. An unplanned attribute will cause the Data Point to also be marked as invalid.
To prevent blocked data from being lost, you can opt for blocked data to be forwarded to an Output with a Quarantine Connection. To illustrate a typical workflow, assume you choose to configure an Amazon S3 bucket as your Quarantine Output.
Anytime a Data Point is blocked, the Quarantine Connection will forward the original batch and metadata about what was blocked to the configure Amazon S3 bucket. You will then be able to:
Learn more about how to use quarantined data here.
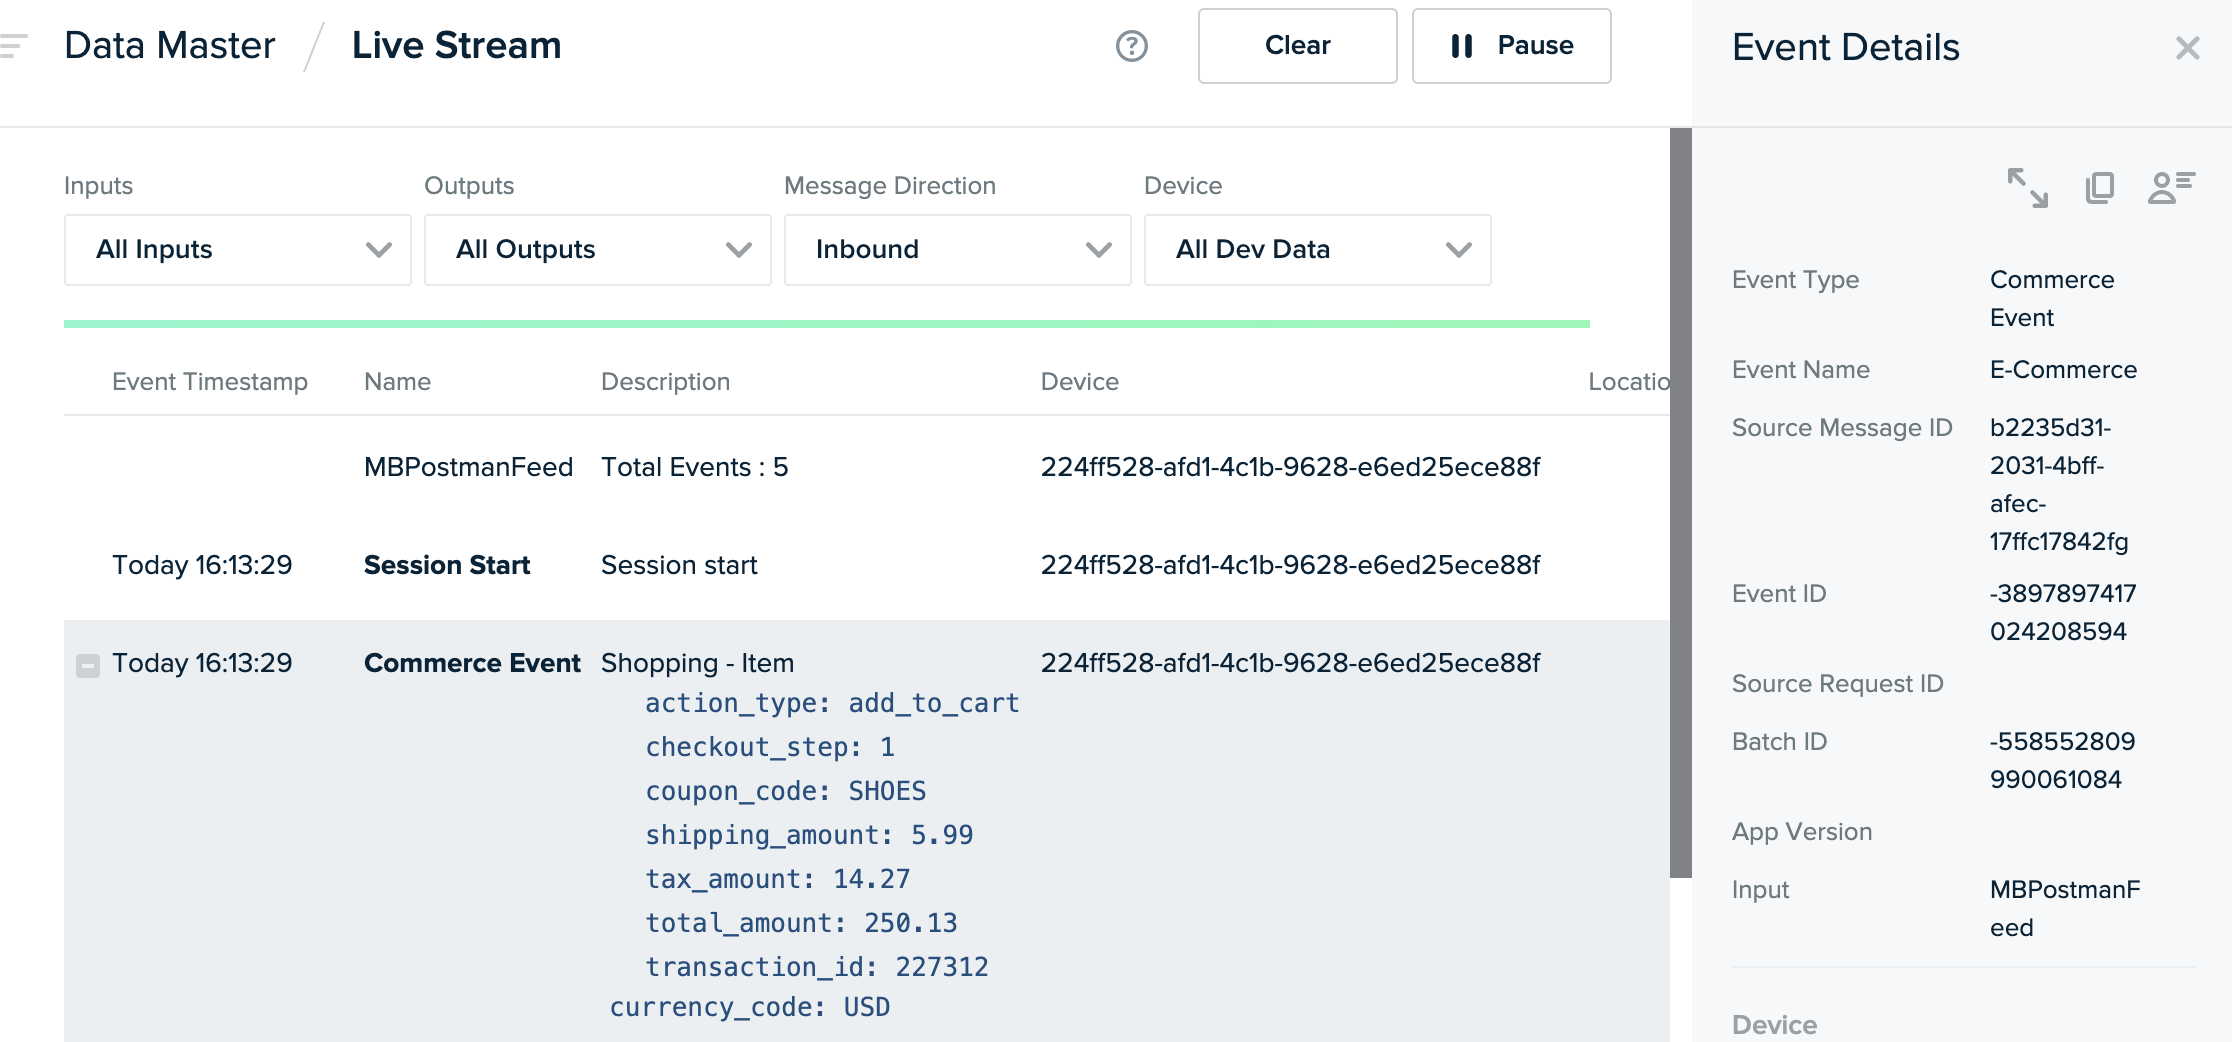
Live Stream gives you a real time view of data coming in and out of mParticle. It allows you to:
You can filter the data shown in the Live Stream in several ways:
Live Stream shows only Dev data, but if you filter for a specific device, the Live Stream will also show events from the Production environment. When attempting to match a device to a device ID, mParticle will look for the following per platform:
ios_advertising_id
in the Events API)android_advertising_id
)mp_deviceid
)To save a specific device:
To view the details of a specific event, select the event from the Live Stream list. The Live Stream pauses, the selected event expands to display additional message details, and a details panel is shown.
We’ve developed tools for you to be able to lint your Swift, Kotlin/Java, and JavaScript/TypeScript code. For more details, click here.
We’ve developed a tool for you to easily create snippets of code that conform to your data plan. To use this tool, click here and for more detailed documentation check out the Github repo.
Was this page helpful?