Feed
Kochava provides a platform to help advertisers better manage user acquisition, optimization, and analysis.
Input Data Details
The following types of data can be configured to be sent from Kochava to mParticle
- Attribution
If the Configured Postback type is “Install”, this is converted to an install attribution event.
- Event Type = Custom Event
- Custom Event Type = attribution
- Event Name = attribution
Install attribution events update the original attribution information stored against the user profile.
If the Configured Postback type is “not-Install”, it is sent as configured in Kochava.
In order to avoid event duplication, mParticle automatically drops Postbacks from Kochava where the attribution_type is Install and event_name is not Install.
- Event Type = Custom Event
- Custom Event Type = attribution
- Event Name = [event name] from Kochava
All attributes included in the Postback are set as custom attributes:
- publisher
- campaign
- attribution_type - install/reengagement
- event_name - provided by Kochava
- any configured event attributes
See mParticle’s JSON attribution custom events reference for more information.
Install versus Re-engagement
Currently, in the Kochava interface, you will create “Configured Postbacks”. Configured Postbacks consist of Install and all other Postback types.
When an advertiser creates a campaign in Kochava, they can designate the campaign as an install campaign which converts on new installs only or a re-engagement campaign which converts on a post install event of the advertiser’s choosing.
There is no concept of a re-engagement postback. However, if a user (existing or new) clicks on an ad with a click URL from a re-engagement campaign and then proceeds to complete the designated conversion action, the postback for that event would contain attribution_type=reengagement.
All metadata will be sent to mParticle. If there are parameters outside of the event metadata - from the click, for example, that you are trying to send to mParticle, Kochava will need more information about what you’re looking for and how that metadata is being sent to Kochava.
If there are other fields that you would like to use, please contact your mParticle Customer Success Manager.
Configuration
Configuring the Kochava Input in mParticle
- Select Directory, and click the Kochava tile.
- Click Add Kochava to Setup.
- Select the Input Feed Integration Type and click Add to Setup.
-
Select the Kochava input configuration group to specify the configuration parameters:
- Configuration Name
- Act as Application
- Click Create.
- Copy the Token.
Configuring a Postback to mParticle in Kochava
Follow these instructions to create a Configured Postback in Kochava.
- Select App Tools > Partner Configuration
- Click Add a Configuration and select mParticle as the Network Partner
-
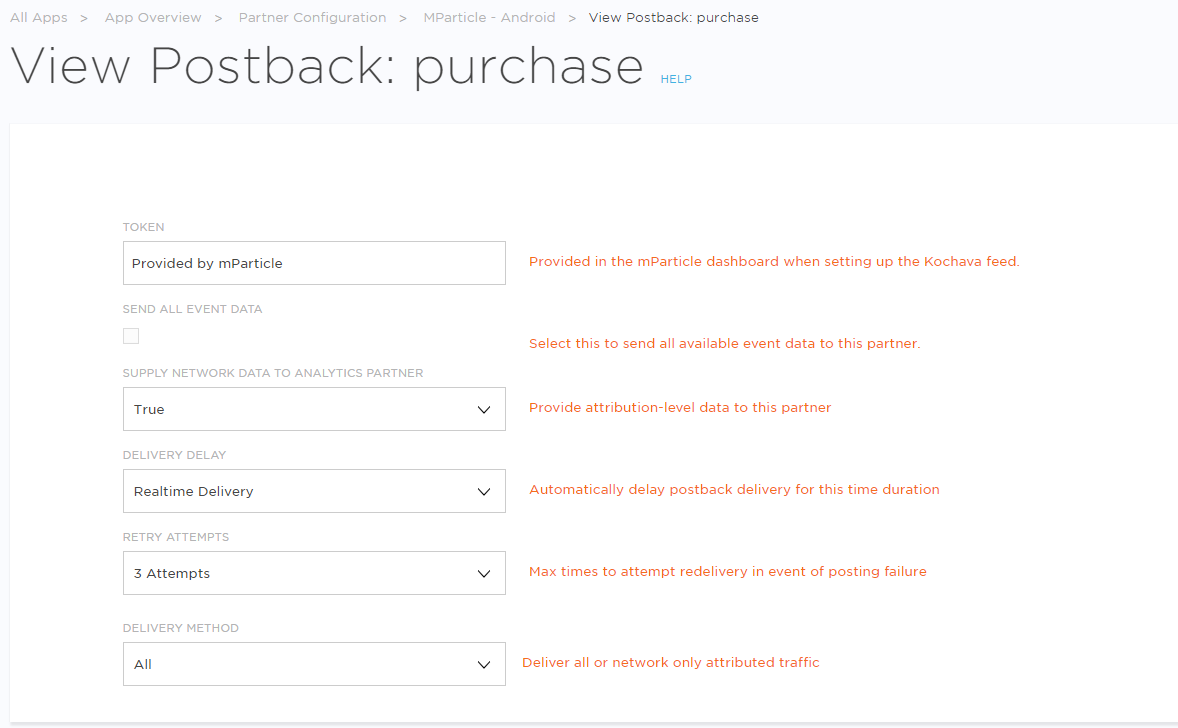
Click Install > Postback Tools > Edit and specify the mParticle specific parameters:
- Enter the mParticle Token, copied from above
- For the Delivery Method, select All
Optional: Check the SEND ALL EVENT DATA box to send any of the parameters set up for this non-install event. For information about how to use this feature, contact your Kochava CSM team.

Was this page helpful?