Step 1. Create an input
An input is the original source of the data you want to track. This could be a website, mobile app, or even a data feed from another platform. The mParticle SDK you use will depend on your input.
Since The Higgs Shop is built using React with TypeScript, we’ll use the Web SDK. However, before we can integrate the SDK into our app we need to create the input from our mParticle dashboard.
1.1 Create an input
- Navigate to https://app.mparticle.com/ and log in. Depending on your location, you might need to log into mParticle via a specific pod URL. For a full list of these URLs view Data Hosting Locations.
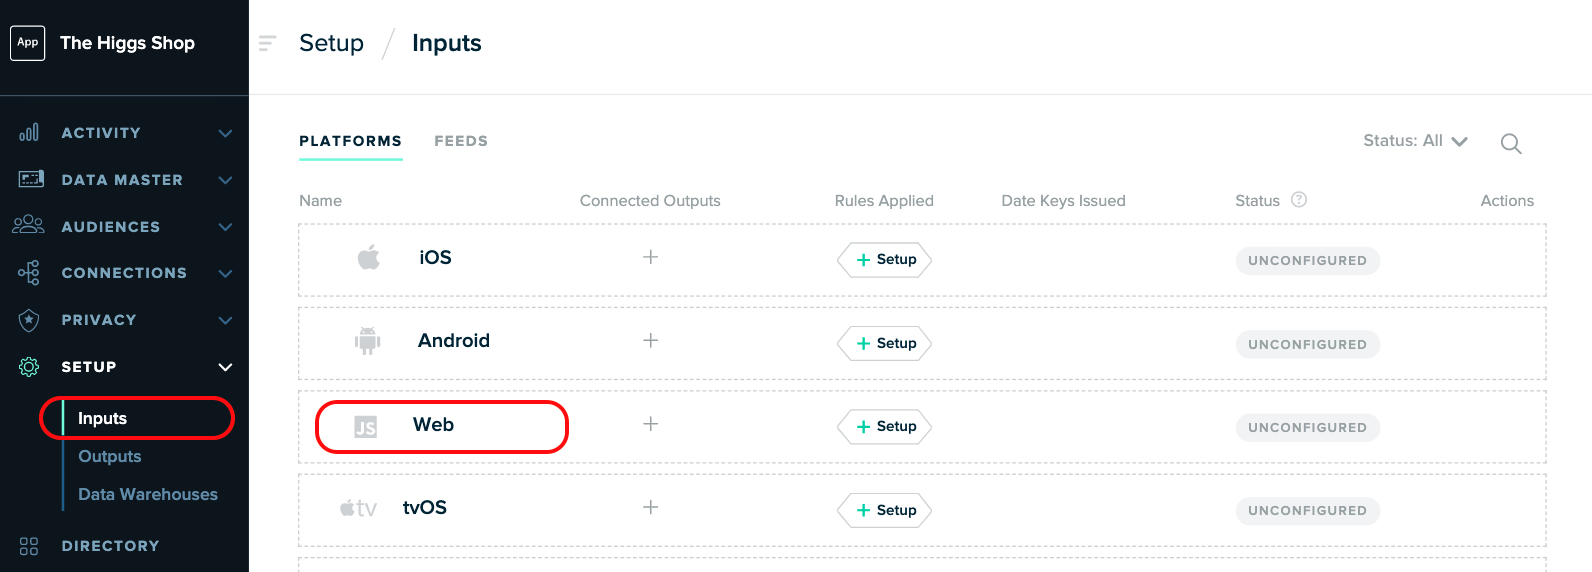
- In the left nav bar, click Setup, then click Inputs. You’ll see a list of supported platforms.
- Select Web.

- Click Issue Keys.
- Copy your new key to your clipboard and click Close.
1.2 Initialize the SDK
To add the mParticle Web SDK to an app, a JavaScript snippet must be inserted in the <head> tag of each page:
<script type="text/javascript">

    // Configures the SDK. Note the settings below for isDevelopmentMode
    // and logLevel.
    window.mParticle = {
        config: {
            isDevelopmentMode: true,
            logLevel: 'verbose',

        },
    };

    (
    function(e){window.mParticle=window.mParticle||{};window.mParticle.EventType={Unknown:0,Navigation:1,Location:2,Search:3,Transaction:4,UserContent:5,UserPreference:6,Social:7,Other:8};window.mParticle.eCommerce={Cart:{}};window.mParticle.Identity={};window.mParticle.config=window.mParticle.config||{};window.mParticle.config.rq=[];window.mParticle.config.snippetVersion=2.3;window.mParticle.ready=function(e){window.mParticle.config.rq.push(e)};var i=["endSession","logError","logBaseEvent","logEvent","logForm","logLink","logPageView","setSessionAttribute","setAppName","setAppVersion","setOptOut","setPosition","startNewSession","startTrackingLocation","stopTrackingLocation"];var n=["setCurrencyCode","logCheckout"];var t=["identify","login","logout","modify"];i.forEach(function(e){window.mParticle[e]=o(e)});n.forEach(function(e){window.mParticle.eCommerce[e]=o(e,"eCommerce")});t.forEach(function(e){window.mParticle.Identity[e]=o(e,"Identity")});function o(i,n){return function(){if(n){i=n+"."+i}var e=Array.prototype.slice.call(arguments);e.unshift(i);window.mParticle.config.rq.push(e)}}var r,c,a=window.mParticle.config,s=a.isDevelopmentMode?1:0,l="?env="+s,w=window.mParticle.config.dataPlan;if(w){r=w.planId;c=w.planVersion;if(r){if(c&&(c<1||c>1e3)){c=null}l+="&plan_id="+r+(c?"&plan_version="+c:"")}}var d=window.mParticle.config.versions;var m=[];if(d){Object.keys(d).forEach(function(e){m.push(e+"="+d[e])})}var f=document.createElement("script");f.type="text/javascript";f.async=true;f.src=("https:"==document.location.protocol?"https://jssdkcdns":"http://jssdkcdn")+".mparticle.com/js/v2/"+e+"/mparticle.js"+l+"&"+m.join("&");var p=document.getElementsByTagName("script")[0];p.parentNode.insertBefore(f,p)}
    )
    // Insert your API key below
    ("REPLACE WITH API KEY");
</script>
Pasting this snippet into the <head> tag on every page of your app is the simplest method of initializing the SDK.
However, The Higgs Shop is built using React, which gives us some helpful tools. We can leverage a layout component to initialize the SDK in a single file. This allows us to call methods in the SDK from other pages in our app without having to include the snippet itself every time.
The Higgs Shop initializes the SDK in the file /src/layouts/App/index.tsx:
const mParticleConfig: mParticle.MPConfiguration = {
    isDevelopmentMode: true,
    logLevel: 'verbose',
    // The identityCallback is a feature of IDSync which will be covered
    // in a more advanced tutorial. You can ignore this for now.
    identityCallback: (result) => {
        if (result.getUser()) {
            const user = result.getUser();
            const identities = user.getUserIdentities();
            console.log('User Identities', identities);
        } else {
            // the IDSync call failed
        }
    },
};

<-- MAKE THIS SUGGESTION IN THE REPO! -->

// This is defined in the .env file
const apiKey = process.env.REACT_APP_MPARTICLE_API_KEY;

useEffect(() => {
    if (apiKey) {
        mParticle.init(apiKey, mParticleConfig);
    } else {
        setApiKeyModalOpen(true);
        console.error('Please add your mParticle API Key');
    }
}, []);
Enter your SDK configuration settings
The SDK snippet includes many configuration settings allowing you to customize your integration to suit your specific business needs. There are only two that you should be aware of at this stage, described in the table below. Note that for this tutorial, it is recommended to use the sample app’s default values for isDevelopmentMode and logLevel.
| Setting | Default Setting | Recommended Setting | Description |
|---|---|---|---|
isDevelopmentMode |
false |
true |
Data sent from your app to mParticle is labeled as either “development” or “production”. Since you are setting up a development environment to test the SDK at this stage, change this value to true. |
logLevel |
warning |
verbose |
There are three settings for logging in the console: none, warning, and verbose. Set this to verbose while you are learning how to use mParticle to see every available warning, error, or informational message. |
For a comprehensive list of the SDK configuration settings, see Configuration.
1.3 Insert your API key
Before you can begin sending data from your app to mParticle, you must add your API key to your app:
- Rename the file
/higgs-shop-sample-app/.env.sampleto/higgs-shop-sample-app/.env - Set the value of the
REACT_APP_MPARTICLE_API_KEYenvironment variable to the API key you created in step 1.1 and save your changes.
Was this page helpful?